Showing posts with label Tips and Tricks. Show all posts

Thursday, October 6, 2011

Yup......another Lamp Post

Hey Chicas!

My name is Caitlin and I have a lamp fetish.  Yeah, that's what I've figured out.  No matter where I am if I see a lamp, I have this inner voice telling asking me to buy it.  I really don't understand where it steemed from.  Like if you like to hoard collect things, generally it's becuase at some point, things were taken away from you.  I can never say that a lamp was taking away from me.  What?  You don't think that it's the same level...believe me if you were in my head, it would be.

Where was I.....right....my "problem".  Every where I go I always zero in on lamps, Winners, WalMart, Habitat for Humanity, auctions, thrift stores..see my drift.

So I was at Habitat for Humanity and zeroed in on my very ugly dated lamps.  Complete with the pleated shade.


There were actually 4 lamps that  I got in total, made up of 2 different styles.  They were marked at $15 a piece, so I was mentally calculating the costs to fix them up.  Because you can get awesome shades at a good price at Winners/HomeGoods so I figured, sure why not, I liked the lines and shape of them.

See the $15 price tag, well that's not really what I paid for them....

 You notice how the 1 is kinda rubbing off....obviously they had been sitting there for a while.  Other peoples loss is totally my gain.  There was an older lady working the cash, and she missed that little 1 before the 5 meaning they were rung in at $5 a piece!  I got all 4 lamps for under $22, taxes in, so a total score. :-)

They needed a little love, as I'm not really feeling a dusty pink with cheap shiny gold, just not quite my style.

Before pics for your enjoyment...

I actually took the lamp apart, and sprayed each piece individually (you totally don't have to do that you could just spray it together, whichever way floats your boat).  So after it was taken apart, I wiped the lamp down as it was major dirty/grimy, likely from the 80's.  First I grabbed Rust-oleum Spray primer in Grey to ensure that the shiny areas would take the paint.  Then I took Rust-oleum Navy Blue Gloss spray paint for the actual color.  It was amazing to cover, I really do think that the primer makes all the difference.  The whole process took about 2 days, as I let the parts for a set/cure for one whole day just to ensure that it was all set.  Better to be safe than sorry, I hate nicks and bumps, so anything extra to help avoid it is wonderful.
 The $5 lamp doesn't even look the same anymore....

The color is gorgeous deep true navy blue.  Sorry all the pictures were taken at night, the mornings are just to rushed to attempt pictures.  I think that the bottom middle color is the truest to real life color.  The difference that $12 in spray paint, and $20 drum lampshade can make. (It took me forever to find an off-white drum shade, ended up paying more than I wanted to at Sears but hey, I'd been looking for 2 weeks)  The coverage is excellent, and the cost is still well below what a good sized new lamp would run you.  Plus with this excellent color, they now match the bedding set, which, is nice, as the pink didn't really go!

So just one more look at the comparison.  Plus that white shade gives so much more light to the surrounding area, then the god awful pink.

So for few changes the impact is huge, really the paint and shade totally changes the look and feel of the lamp.  Before it looked totally dated and now it looks modern.  A definite score :-)


Have you done any DIY like makeovers lately?

Caitlin xoxo

Wednesday, September 28, 2011

Pimples Suck!

Hey Chicas!

I think that I would be hard pressed to find someone to argue with that statement (but hey its the web, so you never know).

I've had many issues with the dreaded pimple.  It all started in grade 8, and got worse in grade 9.  I know some people see my face are like oh you don't have any issues with it.  And I just smile and say thank you, all the time thinking in my head, thank god my concoction is working for me!  It started in grade 9 taking medication for my face...yup it was that bad.  So I was able to stop taking them when I reached university, leaning myself off the 4 a day to just 1 a day and then to none.  I haven't taken any medication for a few years now.  

Anyway, not that I'm giving you my sad history, but just a little context to my pimple history (that sounds kinda gross eh?).  So hence, when I see a breakout starting, my mind goes back to what it was like and what if it happens again?.....

So I have been using this little system for a while now, and when I do breakout it has proven to be effective, and when used correctly and everyday, it defiantly does the trick!

Here are my go-to keepers...

Yup, nothing earth scattering, but tried true and tested.  

Noxzema Triple Clean Anti-Blemish Pad.  I know it has some alcohol in it, yes I know my stance on it, but really this Sh!t is awesome.  I generally only use it at night after I have cleaned my face, just to ensure that all the makeup is off, and any traces of dirt/grim etc is removed.  It does sting a little, but I really haven't found it drying to my skin at all, which is awesome.  The price is around $6ish and you get like 90 pads, so its cheap and cheerful.

Second it is like my bff, for over 2 years (some friends don't even last that long..hehe).  Clean & Clear persa-gel 10, 10% benzoyl peroxide.   Unfortunately, for us Canadians, we can only get the 5% strength (I think, let me know if I'm wrong, though), I pick mine up during my yearly trips to Maine.  Its the only spot treatment that seems to work.  This one tube will last you about 1 year, if you don't overuse it. 


Thirdly, this is like my new favorite toy...

Picked it up at Wally-Mart for around $5.  FreeMan Facial Clay Mask - Avocado & Oatmeal.  Clay masks are perfect for oily skin, the clay will basically suck up the excess oil in your skin, taking the impurities right along with it.  As the mask dries, it will get tight and dry (duh), so avoiding the eye area is really really important.  I've used it all over my face, and as well for spot treatments.

This is how I use the products, on my face on a daily basis.  

After I have washed my face, I apply the Noxzema pad, concentrating on the problem areas.  If I feel a spot coming or have one to deal with, I do these next steps if my face is clear, the Noxzema pad is totally enough!  If I have a problem area, I apply the benzoyl peroxide to the area, and let it dry (I usually do my teeth at this stage, if we wanna get all specific).  Next, which is what I think really is just the icing on the cake.  I apply the Clay Mask over top of the benzoyl peroxide on the problem area.  I leave this mixture on the area the whole night, because the clay mask dries it won't stain your sheets or clothes - just as long as you wait the few minutes for the clay to dry.

That's how I deal with the issues, to ensure that my skin is nice and clear.  I caution you to avoid using it heavily if you are not overly oily, because you will get some dry spots on the areas.  But for me a little dry patch is much better/easier to deal with then a big ass pimple.  

I really think that the use of both acne medications the salicylic acid (Noxzema Pads), with the benzoyl peroxide at 10% (Clean & Clear spot treatment), really hit both areas of problem pimples.  And with the clay mask holding in all the treatment all night will ensure that the medication gets properly absorbed into the skin.

So this is my magic solution, obviously nothing is perfect, but its as close as I can get it.

Caitlin xoxo
psst...previous posts on the subject that you might be interested in...
Clean&Clear Advantage Mark Treatment
Skin Issues Breakouts
Q&A: Blind Pimples


Saturday, September 24, 2011

A new shake on Sparkle Nails!

Hey Chicas!

So hows your weekend going?  One more day to enjoy before Monday comes....make the most of it!

I wanted to try out a new nail look, that I have been seeing online lately....the one with the sparkles on the tip!


I tried it and I just LURVE it!  I'm just beyond, its soo easy to do and super quick and the impact is fabulous! (just a point of context, this post took easily 2-3 times longer than actually doing the nail look)

So the tools....
1. Sparkles...well duh.  A lot of the blogs were talking about the Martha Stewart Glitter.  I don't know about you, but Martha Stewart items are not generally known to be friendly on the pockets.  So I picked up some Superfine Glitter packages at the Dollararma in the craft aisle.  They have a number of colors to chose from and you get 6 different colors for one dollar!  So yeah, feel free to share this stuff with your BF as it will last you a good long time!  The best part about this product is that the glitter really is super fine, not big and chunky making it really easy to apply to the nails :)

2.  The nail polish of your choice, I used Essie "Made to Honour", and Essie "To Dry For" top coat (which is my favorite ever).  The polish is a real neutral and makes your nails look so shiny and healthy, double bonus!  I used my ELF Concealer Brush, as it has nylon bristles, so any small craft brush will totally work to pick up the glitter.

So the fun stuff.  First off, apply a base coat, to help protect your nails from the glitter when you have to remove it.  Next apply one coat of your chosen nail polish wait until tacky dry.  Then when you are going to apply the glitter, apply the second coat of polish only to 2-3 fingers, you don't want the polish to get to dry before you get the glitter on the nail.

I chose a pink/rose champagne tone sparkle, to go with the polish.  Feel free to match sparkles or go bold and use contrasting colors!

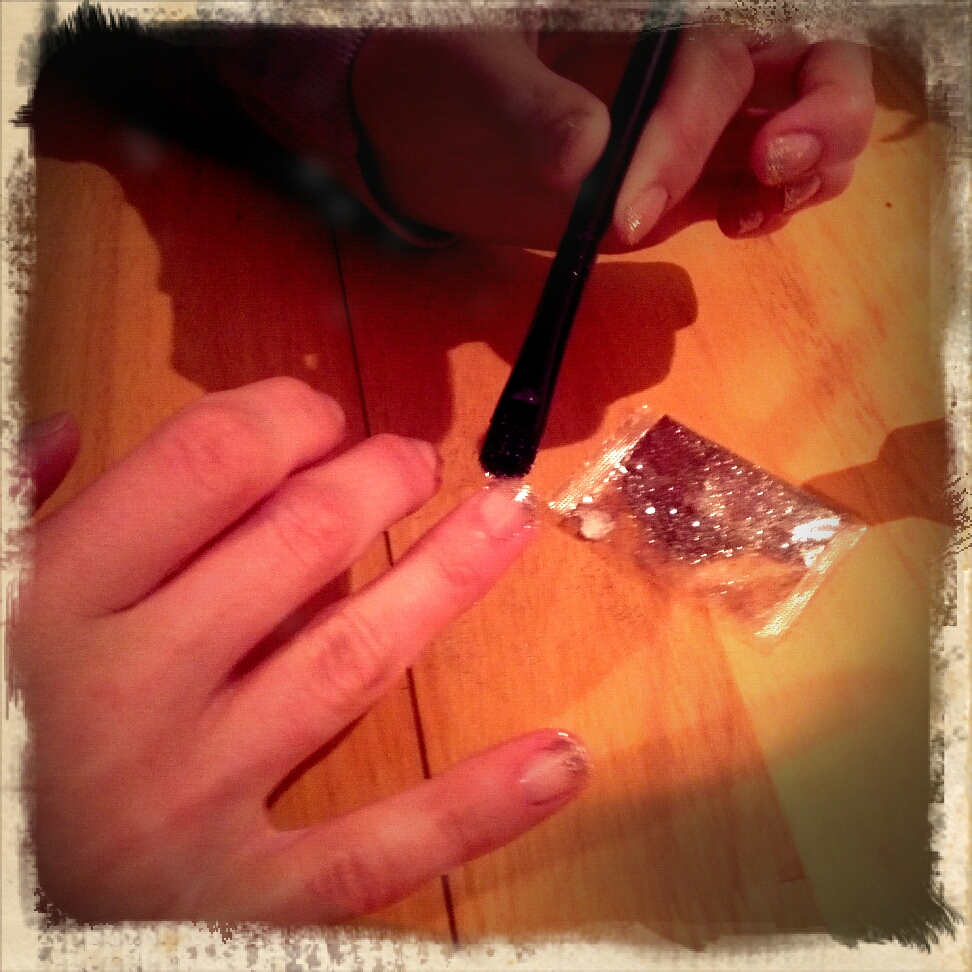
So for the application of the glitter, make sure that the nail you are applying the glitter to is still wettish.  Dip the top of the brush into the packet of glitter.


The brush should look like this after you have picked up the glitter....
try to keep it on the tip, just makes for less fall out, no biggie if you can't/don't, as I didn't...hehe

Then all you need to do is a gentle patting motion while placing the brush with the glitter on the tip of the nail...

Slowly make your way across the top of the nail.  Don't worry about the straight edge of the glitter that's not what we are going for here, just get the glitter on the polish (when still wettish).


Once the glitter is on the tip, your brush will still have some glitter on it (umm obviously it's glitter, that crap sticks to everything - you have been warned!) simply go over the edge of the glitter line and down onto the nail itself.  This will give your nails a dipped into glitter look, and make it look like the glitter has fallen down on to the nail on its own.  It's just a little more natural that way. (I totally laughed out loud as I typed that...glitter natural? oh if only!)


Simply repeat the process for the rest of your digits!  Once you have the look that you want let it dry, no like really dry, so the glitter sticks to the polish really well.

See how I have some random sparkles below the tip, it just looks...*cough* more natural....

The top coat is really the only tricky part of this whole process.  As the sparkle doesn't have to be perfect, believe me the more loose sparkles on the nail the better, so no stress k?

To ensure that the sparkles don't gravitate fully on down the nail, you'll have the apply the top coat to the nail polish section only first then apply to the sparkles on the tip second.  If you simply apply it the standard way, the second pass on the nail will transfer the sparkles on the base, which isn't bad but avoidable.  I recommend two coats to get the sparkles semi smooth and not too rough to the touch.

And there you have it, a totally over explained (hopefully not under) tutorial on how to get updated sparkles for your nails.


 It's a great way to rock sparkles in a grown up way, it's not your younger sister's sparkle nails!

Let me know what you think, and if you've tried it!

Caitlin xoxo


Monday, September 19, 2011

Instyler - Is it the end all be all?

Hey Chicas!!

So I had purchased the Instyler a while ago at Walmart.  It was on clearance for $45, and online I've seen upwards $140, so that was a little push towards getting it for sure.  


 Plus, I was in the market for new straightener, but one that could make hair straight, curl, body etc, I was pretty much sold!  I had seen it on an infomercial down in the states a few months back so I had heard all the hype around it, and figured meh...might as well try for it.  If you aren't aware of it, check out the site, they have videos and tutorials!

So I had tried as just a styler, meaning just smoothing out my hair, and giving it some body.  I find that some straighteners make my hair flat, you know lack of body, and I don't like the pin straight look, my hair is on the fine side, and pin straight just doesn't work so well.  I need the little curl or flip on the end to work it!
So I thought that because it works so well on my hair on normal circumstances, for that extra polished look.  But would it really do what the videos show with curly/wavy hair?

So it was Saturday morning, and I just didn't want to do anything with my hair but it needed something....
See I was right, I couldn't possibly go out...in the public....with that hair (it was a style attempt that FAILED).

Plus I was pretty tired that morning for few exciting reasons (if you don't know what I'm talking about click here for the first, and here for the second), hence the slightly out if it expression...hehe.

So I just followed the directions for the styler that I saw on the infomercials, yes there is a explanation booklet, and even a DVD but umm..its like a hair tool, I wasn't going to waste my time with that! (pss..I think it would help, you'd figure sh!t out alot faster than I did).

I basically sectioned of hair and placed the barrel under the hair, while slightly twisting my wrist while pulling the styler down the hair.  

So I started with this....

and this....

and after a few passes I got this...

and the final look....

much much better than the before, am I right or am I right!

So I really like the product, at a price around $50 not at around $140, that's just a bit much for my shallow pockets.  On the Canadian site...https://www.instyler.ca/ they have some sort of trial offer for $15ish, just an FYI.

I do love the shine and smoothness that it provides my hair, it's a quick fix in the mornings, and I love that it can do a few different things.  So much nicer for packing, 1 as compared to like 3, yes please!  Your hair isn't super ass hot after you use it either, which makes the style much easier to maintain, as your hair doesn't have to cool down much. It does do what it says it does....at least with my hair type.

If you can find it on sale, go for it, don't get suckered in for full price ;)


Caitlin xoxo


Friday, September 16, 2011

L'Oreal Paris Best Bold Eye Beauty Blogger Contest

Hey Chicas!

First off I want to thank my loyal readers, and those who just pop in every once and awhile, I love you all the same!  Promise!!

So, I'm sure that you have all read my previous post this week on the contest that I've entered, if you haven't please please go check it out......Infallible Eye Color - Rich Jewel Tones.


If you'd rather not read but watch and listen, check out my video.  You have two options you can check my  youtube channel out....Rock Jewel Tones on your Eyes video.

Or you can check out the L'Oreal Paris Canada Facebook Page, because I have been chosen as one of the top 5 finalists in the L'Oreal Paris Best Bold Eye Beauty Blogger Contest!!!

http://www.youtube.com/playlist?list=PL32BFB186D5AA0D59

My video is now posted on their Facebook Page!  I know its just beyond awesome, I'm so flattered that the judges have chosen my video. :-D


This is where your help really comes in.  Fans can vote and leave comments on the videos that are posted and the winner is determined on the votes and by judges!  So please, please check it out!  Pretty please, with a cherry on top?

The winner will be announced on September 23rd.  I have the chance to win the ultimate prize pack.  I want you guys to be aware of what I could be doing if I do win!

I have an opportunity to work alongside the L'Oreal Paris beauty team to create runway makeup looks for a fashion show at LG Fashion Week Beauty by L'Oreal Paris in October 2011; VIP access to blog backstage at LG Fashion Week (totally taking you guys with me); A one on one makeup-session with L'Oreal Paris Official Makeup Artist for Canada & Artistic Director for LG Fashion Week, Eddie Malter; and (I know there is more!!)  the opportunity to be one of the first to gain insider tips and the latest trends in beauty and makeup for spring 2012 from L'Oreal's top team of experts.

You caught the part where I said LG FASHION WEEK right! Like OMG, OMG, oh my goodness!!

I am just on a cloud right now.  You have no idea how excited I am, and how hard I worked on this video and I'll have to tell you all about the issues I had with getting the pictures correct.  The story is pretty funny, and from the outside looking a little strange, shall I say hehehe.

Thanks so much for your support!  I am soo excited...I'm literally jumping up and down, and screaming like the girly girl that I am!!!

Caitlin xoxo

Monday, September 12, 2011

Infallible Eye Color - Rich Jewel Tones

Hey Chicas!

I have been trying the new L'Oreal Color Infallible eyeshadows for over 2 weeks now!  Let me tell you, when I swatched the colors for the first time with my BF, we both F-R-E-A-K-E-D O-U-T.  The pigment is like cray crazy, and the wear time is beautifully long.  The color choices are great, and definitely on trend for the Fall Winter 2011/2012, which is nice, very nice.

So for those of you that are nosy (jk) and came from YouTube. Thanks for checking it out :-)  So L'Oreal contacted me via email about participating in a contest using the above mentioned shadows.

The goal was to create a bold eyelook, and it could be day time or night, whatever goes!  I was sold, they said that they would send some product for the particpants to use the video.  So I was expecting to see like 1 or 2 shadows in the box when it arrived.

Well the thought was a sadly mistaken on...........I got 9!! 9 flipping full size pots of product at that!

 I was totally taken aback with the product, and the quality, they really are that good.  Now, let get this straight I was not given any other freebies from this beyond the below listed products that were sent.  Everything else that you see in video and listed below was purchased my ME.  Yup little old me, and many items I already.  So yeah that's the deets!  Now lets get on with the makeup!
 
Swatches!
Swatches from left to right: Time Resist White, Hourglass Beige, Forever Pink, Flash Back Silver, Purple Obsession, Burning Black, Permanent Kaki, Unlimited Sky, All Night Blue (all were provided by the company, all other products and shadows were purchased by me)
I loved the colors so much during my testing/trial period of the them, that I had to get the rest of the collection.  There are 11 shadows in total, and I was provided 9, so the last two I convinced myself I just needed to have.
L-R: Endless Chocolate, Eternal Black
So they run about $12 a pop.  Which is really good for the amount of product you get, and the little amount that you need will last you a long while.  You can even feel free to....dare I say....share the makeup with your friends.  The pigment and the shimmer is beyond, usually its one or the other, but both is great.

So the look that I came up with.....
I wanted it to be deep and sultry, and I got inspiration from the center of a peacock feather.  The video below will show you how to get the look, and the products are listed down there too!  You're welcome :-)


Full List of Products:
Palladio Herbal Eyeshadow Primer
Infallible Shadows
Hourglass Beige
Time Resist White
All Night Blue 
Unlimited Sky 
Burning Black
Permanent Kaki 
L'Oreal Liner Intense Felt Tip - Carbon Black 
Black Kohl Eyeliner
L'Oreal Double Extend Mascara in Black
Forever Pink/Hourglass Beige (used as a highlight)
Natural pink blush 
Time Resist White (used to enhance the size of your lips)
L'Oreal Infallible Never Fail Lip Gloss - Modern Mauve


 So seriously try this stuff out, you will love it! Just like I love it!
Caitlin xoxo

Tuesday, September 6, 2011

Glowy Luminous Skin - the non greasy kind

Hey Chicas,

So this video has taken  be forever to do, and edit, my video editor has been tres touchy!!  

Regardless, this is the step by step process that I go through to get that perfect luminous looking skin, without using any specialized products, except for maybe a little moon glow (by Hard Candy), but I mean a teeny tiny amount of it.

So the video below is a lot slightly longer and has tiny reviews throughout, plus a little more of my personality shows through....let me know if you like it like that or the more professional way of the previous ones.

I personally like this look because it just gives your face a gorgeous luminous glow, almost like you're glowing from the inside, you know the way the young wiper snappers skin looks.


It's a nice neutral natural look, that just emphasis all the good aspects of your features without having to cover it all up!


You see the way the light hits the cheek bones!!  It makes your features more pronounced and totally highlights the high points of your face, in turn making you look more chiseled!

So checkout the video below for all the details on how to get this look!


Complete list of products:
Covergirl Nature Lux Foundation
Garnier Nutrisse Anti-Dark Circle Eye Roller
Bed Head Wipe Out Fix Stick - Light
Hard Candy Welcome Matte
Milani Brow Fix It - Light
Milani Sunset Duos - Sunset City
Sally Hansen Natural Beauty Inspired by Carmindy - Ginger
Too Faced Eyeshadow Primer
Sally Girl Shadow - Gun Metal, Champagne, Taupe, Golden Bronze, Black Brown
NYC - White Eyeliner
Annabelle Smudgeliner - Sapphire
NYC Voluminizing High Defintion Mascara - Black
Sally Hansen Lip Tint - Pomegranate


Caitlin xoxo

Tuesday, July 19, 2011

Can your hair avoid humidty?

Hey Chicas!

So with the weather that we we have been having lately is totally on conducive to my hairstyles.  No I'm being 100% serious here.  Its damp out, like the air is damp, or its raining, or the humidity level is high.  Either way  my hair is having a field day!

I'm sure if you have wavy/curly hair that can go straight or curly you understand my pain.  As soon as some dampness comes in the air my hair notices it, and takes advantage of the opportunity to curl in places that....well....I just don't want it to curl!

This is my hair curly....


So its easy to show that when it is blown straight it doesn't take too much to get the curls active again.

Regardless, I thought that I would try the John Fredia Frizz-Ease Weather Works Shampoo Conditioner, and styling creme.

The bottle say that...

"Developed for all hair styles, Weather Works Shampoo with "Shielding" Technology creates a barrier to help block out style-ruining humidity providing essential preparation for weather-resistant hair.  Formulated to provide silky-smooth texture and to control frizz year round. Safe for natural or colour-treated hair.  For daily use."

Personally I think that using anything that will 'shield' your hair is basically putting a coating on the hair shafts, so everyday use it likely not the best.  But for special events or just special days it could work!

So overall in the shampoo and conditioner they were good, nothing special to say, simple, they smelled good though.  The styling creme is really light weight, and doesn't weigh your hair down.

So lets do a little test, I thought.  I used all the products on a day that was 90% humidity and when I was near the waterfront, and it was windy.  So horrible weather for curly/wavy hair that was blown dry straight, but perfect weather for testing the ability of the John Fredia Frizz-Ease Weather Works.

This is my hair after styled, I was sitting solo on these photos so please the facial expressions....well lets say I've seen better :-).
So by no means was it straight as a pin, because come on, you can't fight with nature 100%.  There was some flips on the end of my hair, and curled in and out in other places, but it was not curly (and no I did not curl it, just the blow dryer)!

So I was in the outside weather from 5-11pm near the water, high humidity like 92%, and high winds!  I don't think that any product, and this is no exception, can make your hair NOT curl, well at lest not an at home product.

So my thought are....well what are my thoughts?  I guess that it did an ok job, you judge by the pictures.  (keep in mind that the after pics are with my Atrix, not a real real camera..k?)  It did keep the frizz level fairly low, but did it stop it from curling?....ummm nope-nutta!  So is it worth that extra product taking up space in your valuable bathroom storage.  I really don't think so.  Any John Fredia no frizz  product does the job, so the Anti-humidity just leave it and forget it.


As a side note, I used the styling creme with my normal hair routine, on an equally curly/wavy hair blown straight day weather nightmare.  The results, pretty much the same as when I used it with the shampoo and conditioner, so perhaps the styling creme is a go, but leave the others on the shelf....unfortunately the search continues :-(

Caitlin xoxo