Showing posts with label Fall. Show all posts

Sunday, October 2, 2011

Toronto LG Fashion Week by L'Oreal Paris!

Hey Chicas,

So do we all remember those little posts that you guys saw a few weeks ago, begging requesting you to watch a video and comment and vote.  No? Oh, how embarrassing is that....well click here and here for a refresher of my uncontainable excitement.


The basics of the contest was to create a video which I did you can watch it to get up to speed...

I got this look (oh and a big thanks filled with x's & o's to Linds for standing above me on my bed to take some shots, yeah you read that right on the bed, quite the sight)

Anyway, I got a lovely email from L'Oreal Paris Canada notifying me that I am the Grand Prize Winner!

OMG, can you image it!  It's been a week since I've known, and I still  get goosebumps just thinking about this opportunity.


In 2 weeks, I will be getting ready to fly out to Toronto!  My goodness, they chose me.......me, to go to Toronto.  I want to send out a big thanks to everyone who have supported me in this en-devour, my blog, my YouTube channel, watching and leaving comments.  You have all made this possible! (I'm not generally good at thank you's a little smile, a hug, and that's about it, highly underwhelming for this type of opportunity!)

L'Oreal Paris Canada announced it on their Twitter page Sept. 27th!  I was so excited, because that meant that I could tell people about it :-)


So with that I figured that I should learn how to use Twitter...a task in it self!

So I'm so excited!  I will fill you guys in on the dets, once they are all confirmed, and please follow me on Twitter @CaitlinChic as I'm assuming that most updates when I'm up there will come from that avenue!

Now I need to go and figure out outfits to wear!


Caitlin xoxo

Saturday, September 24, 2011

A new shake on Sparkle Nails!

Hey Chicas!

So hows your weekend going?  One more day to enjoy before Monday comes....make the most of it!

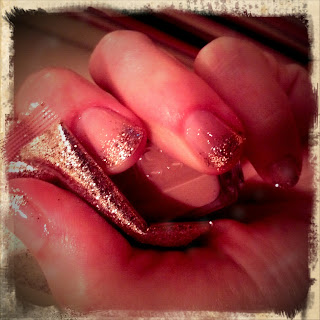
I wanted to try out a new nail look, that I have been seeing online lately....the one with the sparkles on the tip!


I tried it and I just LURVE it!  I'm just beyond, its soo easy to do and super quick and the impact is fabulous! (just a point of context, this post took easily 2-3 times longer than actually doing the nail look)

So the tools....
1. Sparkles...well duh.  A lot of the blogs were talking about the Martha Stewart Glitter.  I don't know about you, but Martha Stewart items are not generally known to be friendly on the pockets.  So I picked up some Superfine Glitter packages at the Dollararma in the craft aisle.  They have a number of colors to chose from and you get 6 different colors for one dollar!  So yeah, feel free to share this stuff with your BF as it will last you a good long time!  The best part about this product is that the glitter really is super fine, not big and chunky making it really easy to apply to the nails :)

2.  The nail polish of your choice, I used Essie "Made to Honour", and Essie "To Dry For" top coat (which is my favorite ever).  The polish is a real neutral and makes your nails look so shiny and healthy, double bonus!  I used my ELF Concealer Brush, as it has nylon bristles, so any small craft brush will totally work to pick up the glitter.

So the fun stuff.  First off, apply a base coat, to help protect your nails from the glitter when you have to remove it.  Next apply one coat of your chosen nail polish wait until tacky dry.  Then when you are going to apply the glitter, apply the second coat of polish only to 2-3 fingers, you don't want the polish to get to dry before you get the glitter on the nail.

I chose a pink/rose champagne tone sparkle, to go with the polish.  Feel free to match sparkles or go bold and use contrasting colors!

So for the application of the glitter, make sure that the nail you are applying the glitter to is still wettish.  Dip the top of the brush into the packet of glitter.


The brush should look like this after you have picked up the glitter....
try to keep it on the tip, just makes for less fall out, no biggie if you can't/don't, as I didn't...hehe

Then all you need to do is a gentle patting motion while placing the brush with the glitter on the tip of the nail...

Slowly make your way across the top of the nail.  Don't worry about the straight edge of the glitter that's not what we are going for here, just get the glitter on the polish (when still wettish).


Once the glitter is on the tip, your brush will still have some glitter on it (umm obviously it's glitter, that crap sticks to everything - you have been warned!) simply go over the edge of the glitter line and down onto the nail itself.  This will give your nails a dipped into glitter look, and make it look like the glitter has fallen down on to the nail on its own.  It's just a little more natural that way. (I totally laughed out loud as I typed that...glitter natural? oh if only!)


Simply repeat the process for the rest of your digits!  Once you have the look that you want let it dry, no like really dry, so the glitter sticks to the polish really well.

See how I have some random sparkles below the tip, it just looks...*cough* more natural....

The top coat is really the only tricky part of this whole process.  As the sparkle doesn't have to be perfect, believe me the more loose sparkles on the nail the better, so no stress k?

To ensure that the sparkles don't gravitate fully on down the nail, you'll have the apply the top coat to the nail polish section only first then apply to the sparkles on the tip second.  If you simply apply it the standard way, the second pass on the nail will transfer the sparkles on the base, which isn't bad but avoidable.  I recommend two coats to get the sparkles semi smooth and not too rough to the touch.

And there you have it, a totally over explained (hopefully not under) tutorial on how to get updated sparkles for your nails.


 It's a great way to rock sparkles in a grown up way, it's not your younger sister's sparkle nails!

Let me know what you think, and if you've tried it!

Caitlin xoxo


Friday, September 16, 2011

L'Oreal Paris Best Bold Eye Beauty Blogger Contest

Hey Chicas!

First off I want to thank my loyal readers, and those who just pop in every once and awhile, I love you all the same!  Promise!!

So, I'm sure that you have all read my previous post this week on the contest that I've entered, if you haven't please please go check it out......Infallible Eye Color - Rich Jewel Tones.


If you'd rather not read but watch and listen, check out my video.  You have two options you can check my  youtube channel out....Rock Jewel Tones on your Eyes video.

Or you can check out the L'Oreal Paris Canada Facebook Page, because I have been chosen as one of the top 5 finalists in the L'Oreal Paris Best Bold Eye Beauty Blogger Contest!!!

http://www.youtube.com/playlist?list=PL32BFB186D5AA0D59

My video is now posted on their Facebook Page!  I know its just beyond awesome, I'm so flattered that the judges have chosen my video. :-D


This is where your help really comes in.  Fans can vote and leave comments on the videos that are posted and the winner is determined on the votes and by judges!  So please, please check it out!  Pretty please, with a cherry on top?

The winner will be announced on September 23rd.  I have the chance to win the ultimate prize pack.  I want you guys to be aware of what I could be doing if I do win!

I have an opportunity to work alongside the L'Oreal Paris beauty team to create runway makeup looks for a fashion show at LG Fashion Week Beauty by L'Oreal Paris in October 2011; VIP access to blog backstage at LG Fashion Week (totally taking you guys with me); A one on one makeup-session with L'Oreal Paris Official Makeup Artist for Canada & Artistic Director for LG Fashion Week, Eddie Malter; and (I know there is more!!)  the opportunity to be one of the first to gain insider tips and the latest trends in beauty and makeup for spring 2012 from L'Oreal's top team of experts.

You caught the part where I said LG FASHION WEEK right! Like OMG, OMG, oh my goodness!!

I am just on a cloud right now.  You have no idea how excited I am, and how hard I worked on this video and I'll have to tell you all about the issues I had with getting the pictures correct.  The story is pretty funny, and from the outside looking a little strange, shall I say hehehe.

Thanks so much for your support!  I am soo excited...I'm literally jumping up and down, and screaming like the girly girl that I am!!!

Caitlin xoxo

Monday, September 12, 2011

Infallible Eye Color - Rich Jewel Tones

Hey Chicas!

I have been trying the new L'Oreal Color Infallible eyeshadows for over 2 weeks now!  Let me tell you, when I swatched the colors for the first time with my BF, we both F-R-E-A-K-E-D O-U-T.  The pigment is like cray crazy, and the wear time is beautifully long.  The color choices are great, and definitely on trend for the Fall Winter 2011/2012, which is nice, very nice.

So for those of you that are nosy (jk) and came from YouTube. Thanks for checking it out :-)  So L'Oreal contacted me via email about participating in a contest using the above mentioned shadows.

The goal was to create a bold eyelook, and it could be day time or night, whatever goes!  I was sold, they said that they would send some product for the particpants to use the video.  So I was expecting to see like 1 or 2 shadows in the box when it arrived.

Well the thought was a sadly mistaken on...........I got 9!! 9 flipping full size pots of product at that!

 I was totally taken aback with the product, and the quality, they really are that good.  Now, let get this straight I was not given any other freebies from this beyond the below listed products that were sent.  Everything else that you see in video and listed below was purchased my ME.  Yup little old me, and many items I already.  So yeah that's the deets!  Now lets get on with the makeup!
 
Swatches!
Swatches from left to right: Time Resist White, Hourglass Beige, Forever Pink, Flash Back Silver, Purple Obsession, Burning Black, Permanent Kaki, Unlimited Sky, All Night Blue (all were provided by the company, all other products and shadows were purchased by me)
I loved the colors so much during my testing/trial period of the them, that I had to get the rest of the collection.  There are 11 shadows in total, and I was provided 9, so the last two I convinced myself I just needed to have.
L-R: Endless Chocolate, Eternal Black
So they run about $12 a pop.  Which is really good for the amount of product you get, and the little amount that you need will last you a long while.  You can even feel free to....dare I say....share the makeup with your friends.  The pigment and the shimmer is beyond, usually its one or the other, but both is great.

So the look that I came up with.....
I wanted it to be deep and sultry, and I got inspiration from the center of a peacock feather.  The video below will show you how to get the look, and the products are listed down there too!  You're welcome :-)


Full List of Products:
Palladio Herbal Eyeshadow Primer
Infallible Shadows
Hourglass Beige
Time Resist White
All Night Blue 
Unlimited Sky 
Burning Black
Permanent Kaki 
L'Oreal Liner Intense Felt Tip - Carbon Black 
Black Kohl Eyeliner
L'Oreal Double Extend Mascara in Black
Forever Pink/Hourglass Beige (used as a highlight)
Natural pink blush 
Time Resist White (used to enhance the size of your lips)
L'Oreal Infallible Never Fail Lip Gloss - Modern Mauve


 So seriously try this stuff out, you will love it! Just like I love it!
Caitlin xoxo

Friday, December 3, 2010

Winter Makeup Tips - Blush

Hey Chicas!

I thought that since this month of December is very busy with lots of parties and gatherings, I would share some makeup tips to help you look your best.

Today is about blush!  Now, the winter months can really drain the color out of your face, especially mine...


See the difference, crazy right?! So this winter I'm am not using self tanner, none!  I do have a really really good one, that has never ever streaked on me, but I'm going to go au-natural this season! (fingers crossed that I can actually do it!).  Its hard to maintain that health glow that we all had in the summer, but you don't really need to have self tanner or even bronzer to get it back! 

All you need to use is blush!  Yup, I suggest using two shades, one deeper/darker, and the other one a lighter/softer shade of the same color family.  Now you can use one shade of blush, but it won't be soo effective in giving you that natural flush. 


The video gives you the best description of how to use the application techniques, so I"m not really going to attempt to describe it in writing.  But in the video I do use a light bronzer, that is only if you want extra contouring to your face, on a daily basis I just skip the bronzer and use the blush.

Products used:
ELF Bronzer - Warm
NYC Mosaic Color Wheel - Pink Cheek Glow
MAC Hello Kitty - Pretty Baby
         Dupe (well not really but its a nice effect): Joe Fresh Blush - Pink


Tip- An angled blush brush will allow you to apply the blush in the most controlled manner for this application.  A flat topped brush is best for blending out hard edges, or just softening them up.


Hope this helps your holiday makeup routine!

Caitlin xoxo

Monday, November 15, 2010

Clean Purple Smokey Eye

Hey Chicas!

This is a look that one of my friends had requested on another youtube video....a little bit ago.  I promised...sort of...and I decided to do a little switch up on the requested look.  Instead of doing the typical black/grey smokey eye, I have switched it up slightly with white,silver,grey,purple colors instead.


Purple is still in for this fall and winter season and I have already done a all purple eye/face look, you can check it out here...  This one is a little more dramatic and intense look, just because the colors are deeper.

Products used:
Eyes
-Too Faced Shadow Insurance
-Quo Devil/Naughty Quad Palette
  Dupes-ELF Eye Brightening Quad in Dramatic
            - Annabelle Revolver
-Annabelle Buff Naked
-Mayballine Liquid Lash Stiletto in Black
- Revlon Lash Fantasy in Black
- Sally Hansen Cream Blush in Ginger
- Hard Candy Baked Crushed Blush in Honeymoon
-Revlon Colorburst Lipstick in Lilac
-Rimmel Vinyl Gloss in Snog


So this look I like to call a clean smokey eye, because not everything is smudged and looks like the morning after.  But it is still smokey, the way to make it look cleaner is to keep your lid a lighter color, not to have dark blended everywhere. The lighter lid allows it to be a more day time approtiapate look.  Of course the purple in place of the black does help an awful lot.  So if  you want it to be more dramatic for a night out, use the black and purple together and you'll achieve a darker outer corner.

Here is the video below if you wanna know how to rock this look!


Caitlin xoxo

Thursday, November 11, 2010

Remembrance Day

Hey Chicas!

Today is a day that should be looked at on a different light.  Nothing will be posted about Fashion or Beauty.  There are bigger issues then the beauty world.

So instead of thinking of ourselves today, lets remember the veterans.

Poppies (©greatwar.co.uk)

In Flanders Fields

by John McCrae, May 1915

In Flanders fields the poppies blow
Between the crosses, row on row,
That mark our place; and in the sky
The larks, still bravely singing, fly
Scarce heard amid the guns below.

We are the Dead. Short days ago
We lived, felt dawn, saw sunset glow,
Loved and were loved, and now we lie
In Flanders fields.

Take up our quarrel with the foe:
To you from failing hands we throw
The torch; be yours to hold it high.
If ye break faith with us who die
We shall not sleep, though poppies grow
In Flanders fields.


Caitlin xoxo

Saturday, October 30, 2010

Monsters Inc. Wreath

Hey Chicas!

So this is Halloween weekend, even though where I live we don't really have too many little trick-or-treaters but I still enjoy decorating for the night!

I always like taking something that is no longer being used and changing it up to be something else.  And with Halloween it is no different.  This is my latest creation, and I have to say I absolutely love it!!!!

It reminds me of the monsters from Monsters Inc., it must be the combination of the color and the big eyes!


 It is really cute and pretty darn simple to make, my wreath is about 17'' wide, with the centre hole around 4".

All you need is some fuzzy/furry material, I actually used an old pillow that was no longer being used.  They usually look like this, and we got ours at Wally-Mart. 
We were actually going to buy some fabric, but it was really expensive  like $25/yard, for a Halloween wreath, umm....no thanks.  I checked out Wal-Mart and they actually have a fuzzy rug, for about $20, that has a backing already, and it would make 2 wreaths, and you already would have the backing for the back of the wreath, so you have all your fabric.  For my wreath, I simply used some scrap pieces of fleece material, but anything would work, the fleece was the best color match, and since I'm a little anal retentive, color matching is a must for me, but don't feel that yours has to match!

Then all you need are a variety of foam size balls ranging from 1" - 2", I like the variety of eye ball shapes.  Then you need a black sharpie, to make the pupils, and I varied the sizes for more of a monstery feel.  Finally a small glue gun, and lots and lots of glue sticks, the color doesn't matter as it will not show.  These materials can be picked up at any dollar store.

So the steps.
1. Place the fabric good side down (fuzzy side) and trace a circle (mine is oval to maximize the size of the square pillow) to the desired outside size, and trace the inner circle (hint: make the inner cut smaller then you think you want it, as when you sew it up it will stretch)
2. Cut the edges and centre off, while holding the scissors on a slant so that you don't cut off a flat edge of the fur.
3. Place your fur cut fabric on the backing fabric and simply trace around the edges adding a 1/2" all around so that it can be more fluffy and hold more stuffing.
4. Place the good sides together (the fur side and good side of the other fabric) and stitch the outer edges together. (this can be done by hand or a sewing machine, either one works)
5. Turn right side out, and pull out the edges of the fur that have been caught in the stitching to allow for more furriness.
6. Stuff it!  I used the stuffing from the pillow I took apart, but plastic bags and fabric remnants will work too!
7.  Hand stitch the inner circle together.
8.  Stitch a looped end onto the back of the wreath for hanging, as shown above, I used some scraps of the fur so it blended.
9.  Heat up the glue gun!  It will be your best friend.
10. Make the pupils on the foam balls using the black sharpie, and making varying sizes.
11. Separate the fur apart on the wreath so you can see the bottom of the fabric it's attached to.
12. Place a big dollop of glue on the back of the foam eyes, and place on the wreath in the separated part of the wreath so it sticks to the fabric, not just the fur! (this will help the eyes to stay on longer and not wobble )
13. Repeat until the number of eyes suits you!

There are a lot of steps, but I stated little things that didn't really need to be, but what can ya do!

In total I spent only $5 on the foam balls, as everything else I had at home, so search around and see what you find, is there an old blanket, a fur vest/coat you can use.

Have fun making it and enjoy the weekend!

Caitlin xoxo

Tuesday, October 26, 2010

Military Jacket

Hey Chicas!

So the military trend has been on for a long time in the states.....but at least in PEI Canada, the trend really took off this summer and fall.  There are lots of options for affordable jackets at retail stores you can go to, and not have to order it on line.

I found an awesome weight one at Zellers from the Alfred Sung Pure Line (which is awesome by the way) and its perfect especially the in between weather, you know before you have to wear hats and mitts and long winter coats....that's coming soon enough, no need to increase the length of time you have to wear a winter jacket! 

Zellers even has this cool tool where you can build your own outfit to complete the look, which is great if you are not sure what will look good together and work. 

The jacket is the perfect color, and the waist band really cinches you in and gives you a figure in such a man inspired jacket look.


Image: Walmart.com $20ish
WalMart has another option...it is from the Miley Cyrus line...but really have you looked at it in a nonjudgmental light, you know when you don't take into account who it is that "designed"them because some things are really super cute.

This jacket will sit right above your hips and has the big bold buttons which really makes this trend, the key is they aren't load and obnoxious but muted in color so its wearable.  If you looking for a good deal to be in style...this is it.  Did you notice the little layering of slight ruffles at the bottom?  Makes it more girly!

Image: OldNavy Website $50ish
Old Navy also has an option for you...I saw one in the store a few works away in town, but I can't find it on line, so is for all you girls that want a warmer jacket to lead into the horrid cold months.  The color is amazing and the shearling fur is HUGE this year...its a must have! (and that's my excuse for needing buy another jacket).  Its also available in a creamy color, but I recommend you stick with the green, might as well ride the trend.


Image: OldNavy Site $80ish

They have another option...one that is a longer jacket and just as cute.  It has the cute around the collar, which is great for the winter and you can also get in the creamy color as well.  I would say that this coat, if you need to buy a new winter one, should be it, it has a long of trends wrapped up into one, but still remains not to trendy or over the top..sometimes that's hard to find.


I'm sure there are some other options out there, but these are the ones that I've found and love!  I hope you find your best look to rock the trends too!

Have fun shopping!

Caitlin xoxo

Professional Work Makeup

Hey Chicas!

So it has been over a week since I've done anything in regards to this blog.  For that I do apologize. I have been sick, but I have a good excuse......I had some sort of infection or virus....or maybe both! That affected my under eye area....making it super red, puffy and dry scaly looking skin.  Yeah so my makeup application was not easily done nor was it easy to read or type anything.

So my first attempt at making a video in a long time...but I know you guys like to have things written out and tips and tricks...but please let me know what it is you want me to talk about...I have some ideas but I'd like to look at some of your concerns to help you.  So feel free to leave comments on things you want to know about!

I will add some more pictures tonight when I have access to my own computer.

Complete List of Products:
Eyes
Too Faced Shadow Insurance
Annabelle - Buff Naked
Annabelle - Helium
Annabelle - So Foxy
LOreal Intense Liquid Liner - Earthen Brown
Estee Lauder No Smudge Lengthening Mascara

Face
Contour - ELF Warm Bronzer
Highlight - Hard Candy Baked Blush Crushed Blush - Honeymoon
Estee Lauder - Plum Nuance 60

Lips
Estee Lauder - Rose
Gosh - Black Sparkle Lipgloss

Hope that this professional and work appropriate makeup will help you in the mornings get ready.  It is important to look polished but you don't want to look crazy with makeup colors and application, this look below is a way to get the style of smokey eyes but in colors and ways that you can totally wear to the office, or meetings.

So stay tuned for more updates more often...promise


Caitlin xoxo

Monday, October 18, 2010

Fall Look

Hey Chicas!

So I was definitely inspired by the changing leaves out my window this past weekend.  And I very rarely act upon said inspiration, but there is always a first for everything.  See my issue is that I'm a perfectionist......yes I said it but don't expect to see it very often is this blog...less of course I get more personal, and of course if people want to hear my life issues.....which I doubt it.


Anyway, no one cares about that first paragraph, you likely all skipped down to this one, so I'll try to make it more interesting.  The products, as I always try to ensure, are drugstore products that are reasonably priced with great color payoff.

Makeup products used:

Eyes:
Too Faced Shadow Insurance
ELF - eyeshadow base
Eyebrow Fill
Various Colors from e.l.f. Studio Mini Makeup Collection - Eyeshadow
NYC White Kohl Liner
Revlon Total Lash Fantasy- Blackest Black

Cheeks
e.l.f. Studio Mini Makeup Collection- Bronzer
e.l.f. Studio Mini Makeup Collection- Blush

Lips
e.l.f. Studio Mini Makeup Collection - 3 different colors

Basically, I wanted to show you how you can use one palette for the whole look.  There is no reason on your traveling to take a big makeup bag (or 2!), it is quite versatile palette, and if you'd like I can do more look using it....just comment and let me know!


So that's it and here is the video, on how to get the look!


Caitlin xoxo

Sunday, October 10, 2010

Pink Chic - Breast Cancer Awareness Month

Hey Chicas!

So I thought that in honor of those who have had breast cancer, those fighting it, or those who have lost loved ones, that I would do a very wearable pink makeup look.

The look is super easy and fast to apply, I use only Annabelle eyeshadow and all drugstore products, except for eyeshadow primer. The brushes are all ecotools from various different kits that I have.

List of Products:
Eyes:
Too Faced Eyeshadow Insurance
Annabelle Mono Eyeshadow
- Buff Naked
- Sugar Dust
- So Foxy
- Helium
Loreal Liner Intense Felt Tip Eyeliner - Earthen Rock Brown 630
Revlon Total Lash Fantasy - Blackest Black

Face:
Milani Duos - Sunset City
Hard Candy Blush Crushed - Honeymoon
NYC Mosaic Face Powder - Pink Cheek Glow
Joe Fresh blush - Pink

Lips:
Lip Balm
Covergirl Outlast Lipstain -400
OPI Lipliner - L20
Revlon Colorburst - Baby Pink
Rimmel Vinyl Lipgloss- Snog

So this look is very soft and romantic.  It can be worn everyday for a very flattering look for all skin tones.  So I hope you enjoy my version of honoring those dealing with breast cancer.  For the video on to get this total look just click below!

Caitlin xoxo

Saturday, October 2, 2010

Drew Barrymore Inspired Look

Hey Chicas!

 I just received the 2010 October issue of Harper's Bazaar.  And Drew Barrymore is on the cover, now I'm not usually a huge fan of her style, just a little to hippie for me...but lately she is growing up!  I loved her look in the mag, and her look is so easily achieved, and totally wearable for day or night.  So I thought I would give it a go.
Here is the look from the mag...sorry for the quality, but its a picture of my actual magazine.  Now, Drew Barrymore is a CoverGirl, but I don't have too many Covergirl products, not that I don't like them, I just don't have too many of them.  The mag states the exact makeup that was used in the shoot...
-Clean Liquid Makeup
-LiquidLineBlast Eye Liner in Black Fire
-LashBlast Length Mascara in Black
-Eye Enhancers 3-Kit in Shimmering Sands
-Cheekers Blush in Brick Rose
-Continuous Color Lipstick in Pink Chic

That list differs from my list quite a bit, but the outcome is the same and they are mostly drugstore products except for one, and even that can be duped, I just didn't have one.

Well in my opinion the looks are pretty darn similar....so here is my list
-Annabelle Vanilla Chillia 
-Annabelle Buff Naked
-Annabelle So Foxy
-Annabelle Bronzed Idol
-Maybelline Line Stiletto Liquid Liner in Black
-Revlon Lash Fantasy Mascara in Blackest Black
-Sally Hansen Inspired by Carmindy Sheareest Cream Blush in Ginger
-Malani Sunset Duos in Sunset
-Hard Candy Blush Crushed in Honeymoon
-Mac Hello Kitty in Pretty Baby
-Malani Lipstick in Hollywood City
- Maybelline Lipgloss in 620

The comparison shot.....
what do you think?  I love it!

If you want to get this look...check out the vid below!


Caitlin xoxo

Sunday, September 26, 2010

HellCats Halloween How-to

Hey Chicas!


I know its early but for all of those planners out there, we like to know what is going on before Halloween comes, so I thought I would give some makeup and hair tips on some costume ideas.  If you have more ideas on what you are going to be, let me know and I'll do a makeup tutorial on them!


 Here is my HellCats version of the competition to get into Regionals.  I chose the character Marti, because I love her! 

The picture to the right is of her, and the picture to the left is obviously me!


The look is great it would be good for any cheerleading costume.  The bold makeup is very pretty and noticeable but still not unwearable, but I wouldn't recommend you rockin' this at work.  I used all drugstore products except for one which was a BedHead product but can easily be duped by any blue, it was just the only one I had on hand.  So the list of prodcuts are:
Eyes
Primer:  Loreal Magic Perfecting Base
Eyeshadow:
Base - Annabelle Mono Eyeshadow Vanilla Chillia 
Gold - Annabelle Mono Eyeshadow Gold Digger
Brown Base - Annabelle Mono Eyeshadow So Foxy
Light Silver - ELF Shadow Palette in Drama
Dark Silver - ELF Shadow Palette in Drama
Highlight (white) - ELF Palette Shadow in Drama
Liner Upper - Maybelline lash line stiletto in black
Liner Lower (black) -ELF Palette Shadow in Drama
Mascara - Revlon Fantasy Lash in Black

Face
Contour - Milani Sunset Duos
Highlight - Hard Candy Blush Crushed in Honeymoon
Cheeks - NYC Mosaic Face Powder in Pink Cheek Glow
Design - Annabelle Smudgeliner in Electric Sapphire
Gold Star Sticker
Sparkles - Two Option 1. Annabelle Gold Digger or 2. Lola Gold Sparkle Facial Powder

Lips
Bonnie Bell Liplites in Creme Brulee

All products are from the drugstore, and farily priced, all colors can be used in your regular makeup routine.  All the brushes that were used are ecotools, and in the travel set sizes, they are awesome brushes and can be purchased at Atlantic SuperStore!

These colors really give you the exact same colors as on the show.  I have a comparison picture of the work I'm so proud of!

The eye on top are Marti's from HellCats, and the lower ones of my peepers!

I'm just as pleased as punch with this look!  Hope you enjoyed it.  If you'd like to watch how to get his look step by step, check out the video below!


Hope this gives you a great start to the week!  And remember it never hurts to rock the attitude that cheerleaders have either!  Be positive!!

Caitlin xoxo