Monday, September 19, 2011

Instyler - Is it the end all be all?

Hey Chicas!!

So I had purchased the Instyler a while ago at Walmart.  It was on clearance for $45, and online I've seen upwards $140, so that was a little push towards getting it for sure.  


 Plus, I was in the market for new straightener, but one that could make hair straight, curl, body etc, I was pretty much sold!  I had seen it on an infomercial down in the states a few months back so I had heard all the hype around it, and figured meh...might as well try for it.  If you aren't aware of it, check out the site, they have videos and tutorials!

So I had tried as just a styler, meaning just smoothing out my hair, and giving it some body.  I find that some straighteners make my hair flat, you know lack of body, and I don't like the pin straight look, my hair is on the fine side, and pin straight just doesn't work so well.  I need the little curl or flip on the end to work it!
So I thought that because it works so well on my hair on normal circumstances, for that extra polished look.  But would it really do what the videos show with curly/wavy hair?

So it was Saturday morning, and I just didn't want to do anything with my hair but it needed something....
See I was right, I couldn't possibly go out...in the public....with that hair (it was a style attempt that FAILED).

Plus I was pretty tired that morning for few exciting reasons (if you don't know what I'm talking about click here for the first, and here for the second), hence the slightly out if it expression...hehe.

So I just followed the directions for the styler that I saw on the infomercials, yes there is a explanation booklet, and even a DVD but umm..its like a hair tool, I wasn't going to waste my time with that! (pss..I think it would help, you'd figure sh!t out alot faster than I did).

I basically sectioned of hair and placed the barrel under the hair, while slightly twisting my wrist while pulling the styler down the hair.  

So I started with this....

and this....

and after a few passes I got this...

and the final look....

much much better than the before, am I right or am I right!

So I really like the product, at a price around $50 not at around $140, that's just a bit much for my shallow pockets.  On the Canadian site...https://www.instyler.ca/ they have some sort of trial offer for $15ish, just an FYI.

I do love the shine and smoothness that it provides my hair, it's a quick fix in the mornings, and I love that it can do a few different things.  So much nicer for packing, 1 as compared to like 3, yes please!  Your hair isn't super ass hot after you use it either, which makes the style much easier to maintain, as your hair doesn't have to cool down much. It does do what it says it does....at least with my hair type.

If you can find it on sale, go for it, don't get suckered in for full price ;)


Caitlin xoxo


Friday, September 16, 2011

L'Oreal Paris Best Bold Eye Beauty Blogger Contest

Hey Chicas!

First off I want to thank my loyal readers, and those who just pop in every once and awhile, I love you all the same!  Promise!!

So, I'm sure that you have all read my previous post this week on the contest that I've entered, if you haven't please please go check it out......Infallible Eye Color - Rich Jewel Tones.


If you'd rather not read but watch and listen, check out my video.  You have two options you can check my  youtube channel out....Rock Jewel Tones on your Eyes video.

Or you can check out the L'Oreal Paris Canada Facebook Page, because I have been chosen as one of the top 5 finalists in the L'Oreal Paris Best Bold Eye Beauty Blogger Contest!!!

http://www.youtube.com/playlist?list=PL32BFB186D5AA0D59

My video is now posted on their Facebook Page!  I know its just beyond awesome, I'm so flattered that the judges have chosen my video. :-D


This is where your help really comes in.  Fans can vote and leave comments on the videos that are posted and the winner is determined on the votes and by judges!  So please, please check it out!  Pretty please, with a cherry on top?

The winner will be announced on September 23rd.  I have the chance to win the ultimate prize pack.  I want you guys to be aware of what I could be doing if I do win!

I have an opportunity to work alongside the L'Oreal Paris beauty team to create runway makeup looks for a fashion show at LG Fashion Week Beauty by L'Oreal Paris in October 2011; VIP access to blog backstage at LG Fashion Week (totally taking you guys with me); A one on one makeup-session with L'Oreal Paris Official Makeup Artist for Canada & Artistic Director for LG Fashion Week, Eddie Malter; and (I know there is more!!)  the opportunity to be one of the first to gain insider tips and the latest trends in beauty and makeup for spring 2012 from L'Oreal's top team of experts.

You caught the part where I said LG FASHION WEEK right! Like OMG, OMG, oh my goodness!!

I am just on a cloud right now.  You have no idea how excited I am, and how hard I worked on this video and I'll have to tell you all about the issues I had with getting the pictures correct.  The story is pretty funny, and from the outside looking a little strange, shall I say hehehe.

Thanks so much for your support!  I am soo excited...I'm literally jumping up and down, and screaming like the girly girl that I am!!!

Caitlin xoxo

Monday, September 12, 2011

Infallible Eye Color - Rich Jewel Tones

Hey Chicas!

I have been trying the new L'Oreal Color Infallible eyeshadows for over 2 weeks now!  Let me tell you, when I swatched the colors for the first time with my BF, we both F-R-E-A-K-E-D O-U-T.  The pigment is like cray crazy, and the wear time is beautifully long.  The color choices are great, and definitely on trend for the Fall Winter 2011/2012, which is nice, very nice.

So for those of you that are nosy (jk) and came from YouTube. Thanks for checking it out :-)  So L'Oreal contacted me via email about participating in a contest using the above mentioned shadows.

The goal was to create a bold eyelook, and it could be day time or night, whatever goes!  I was sold, they said that they would send some product for the particpants to use the video.  So I was expecting to see like 1 or 2 shadows in the box when it arrived.

Well the thought was a sadly mistaken on...........I got 9!! 9 flipping full size pots of product at that!

 I was totally taken aback with the product, and the quality, they really are that good.  Now, let get this straight I was not given any other freebies from this beyond the below listed products that were sent.  Everything else that you see in video and listed below was purchased my ME.  Yup little old me, and many items I already.  So yeah that's the deets!  Now lets get on with the makeup!
 
Swatches!
Swatches from left to right: Time Resist White, Hourglass Beige, Forever Pink, Flash Back Silver, Purple Obsession, Burning Black, Permanent Kaki, Unlimited Sky, All Night Blue (all were provided by the company, all other products and shadows were purchased by me)
I loved the colors so much during my testing/trial period of the them, that I had to get the rest of the collection.  There are 11 shadows in total, and I was provided 9, so the last two I convinced myself I just needed to have.
L-R: Endless Chocolate, Eternal Black
So they run about $12 a pop.  Which is really good for the amount of product you get, and the little amount that you need will last you a long while.  You can even feel free to....dare I say....share the makeup with your friends.  The pigment and the shimmer is beyond, usually its one or the other, but both is great.

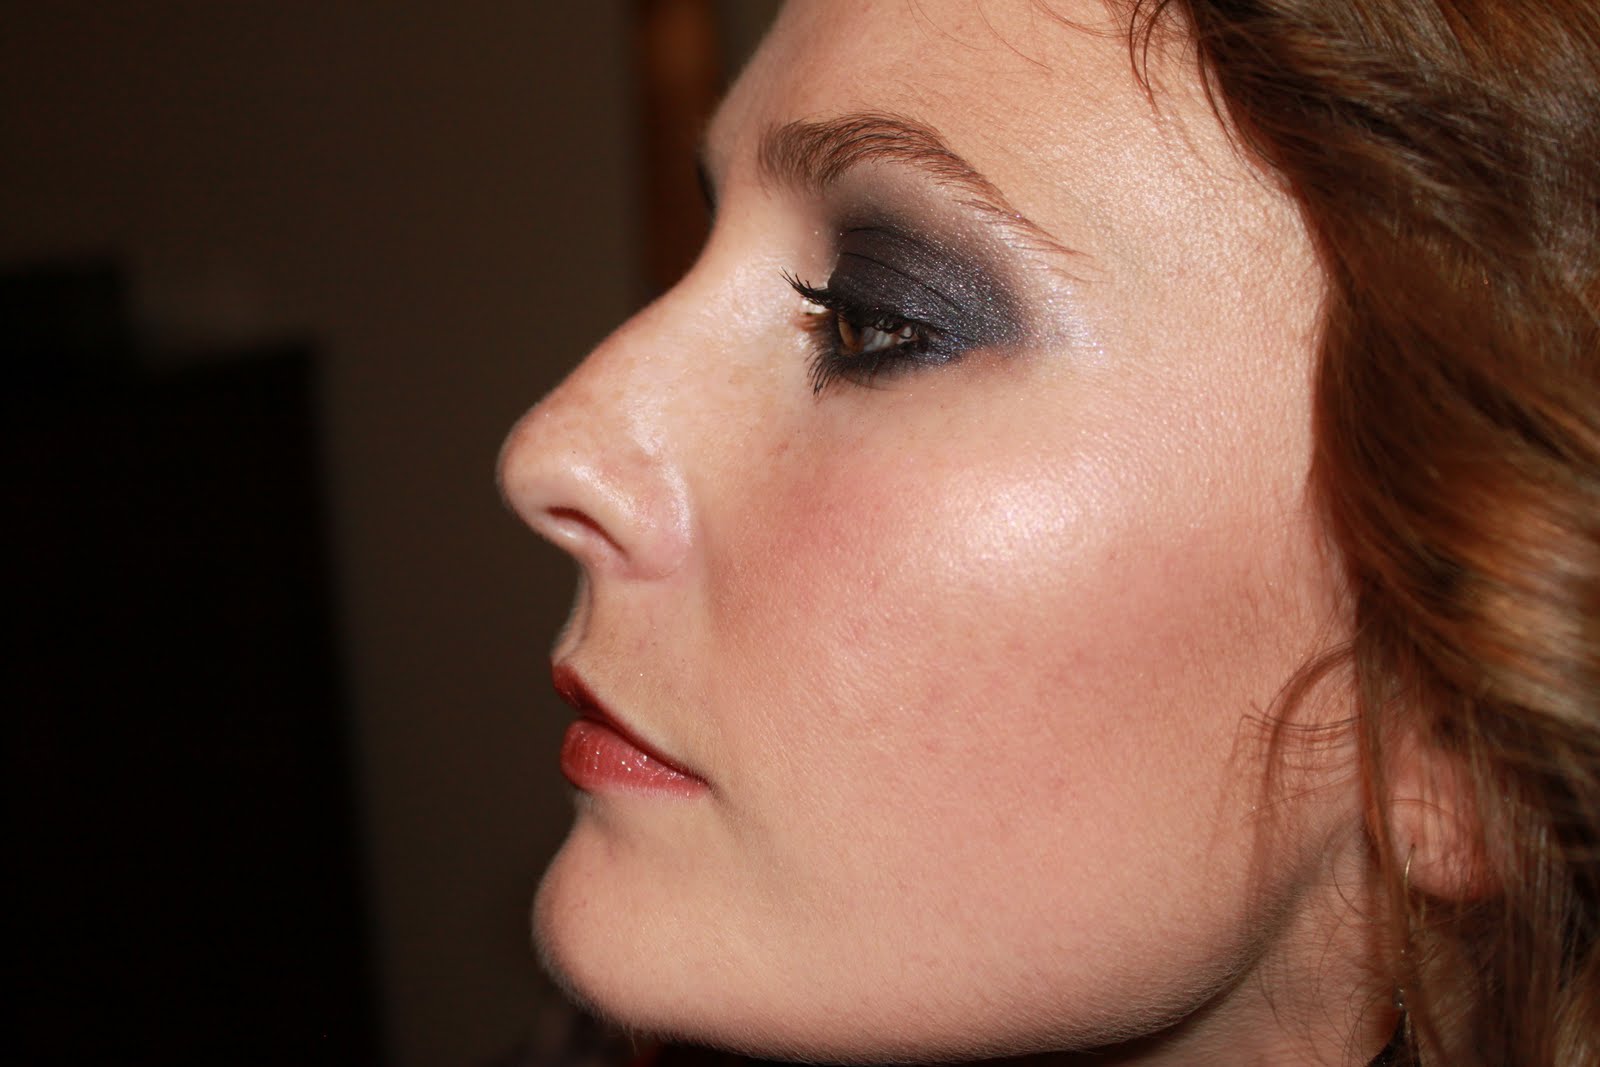
So the look that I came up with.....
I wanted it to be deep and sultry, and I got inspiration from the center of a peacock feather.  The video below will show you how to get the look, and the products are listed down there too!  You're welcome :-)


Full List of Products:
Palladio Herbal Eyeshadow Primer
Infallible Shadows
Hourglass Beige
Time Resist White
All Night Blue 
Unlimited Sky 
Burning Black
Permanent Kaki 
L'Oreal Liner Intense Felt Tip - Carbon Black 
Black Kohl Eyeliner
L'Oreal Double Extend Mascara in Black
Forever Pink/Hourglass Beige (used as a highlight)
Natural pink blush 
Time Resist White (used to enhance the size of your lips)
L'Oreal Infallible Never Fail Lip Gloss - Modern Mauve


 So seriously try this stuff out, you will love it! Just like I love it!
Caitlin xoxo

Tuesday, September 6, 2011

Glowy Luminous Skin - the non greasy kind

Hey Chicas,

So this video has taken  be forever to do, and edit, my video editor has been tres touchy!!  

Regardless, this is the step by step process that I go through to get that perfect luminous looking skin, without using any specialized products, except for maybe a little moon glow (by Hard Candy), but I mean a teeny tiny amount of it.

So the video below is a lot slightly longer and has tiny reviews throughout, plus a little more of my personality shows through....let me know if you like it like that or the more professional way of the previous ones.

I personally like this look because it just gives your face a gorgeous luminous glow, almost like you're glowing from the inside, you know the way the young wiper snappers skin looks.


It's a nice neutral natural look, that just emphasis all the good aspects of your features without having to cover it all up!


You see the way the light hits the cheek bones!!  It makes your features more pronounced and totally highlights the high points of your face, in turn making you look more chiseled!

So checkout the video below for all the details on how to get this look!


Complete list of products:
Covergirl Nature Lux Foundation
Garnier Nutrisse Anti-Dark Circle Eye Roller
Bed Head Wipe Out Fix Stick - Light
Hard Candy Welcome Matte
Milani Brow Fix It - Light
Milani Sunset Duos - Sunset City
Sally Hansen Natural Beauty Inspired by Carmindy - Ginger
Too Faced Eyeshadow Primer
Sally Girl Shadow - Gun Metal, Champagne, Taupe, Golden Bronze, Black Brown
NYC - White Eyeliner
Annabelle Smudgeliner - Sapphire
NYC Voluminizing High Defintion Mascara - Black
Sally Hansen Lip Tint - Pomegranate


Caitlin xoxo

Monday, August 22, 2011

Should Eye Makeup Remover burn?......

Hey Chicas!

So I have been on a eye makeup remover hunt for a while now.   I'm not sold on the whole idea, a lot of people think that they need an eye remover, alot of my makeup....well most of my makeup actually, don't require remover, warm water will do it along with my facial cleanser, so really?  Why pay for an extra product that you don't need?

I bought the Olay Regenerist Eye Make-Up Remover plus anti-wrinke treatment,  which states it "is a rich, creamy formula to moisturize the delicate skin around the eye area while it removes make-up."
 
Well this one got me due to the fact of the anti aging properties to it, and it was on SALE!  You can't blame me for trying.

And try I did, for over 6 months!  I just couldn't deal with the stinging in my eyes.  I just don't think that an eye makeup remover that is designed for your eyes should sting your eyes when you use it.  You get me?  

Plus the fact that it really only smudged the crap around on my face and didn't actually get it off.  The burning sensitization when I opened my eyes with stuff on is a bummer, and to see that my mascara is still there!? Like come on.......please the hype around it was huge, and the payoff was crap.  I didn't notice any reduction of my fine line and wrinkles, not that I have an issue but its rich formula was suppose to hydrate the area, and I really found it to be more drying.  The formula was a nice consistency but it didn't work, and the sting, I'd rather stick with my warm water and facial cleanser.

So this is just my opinion on the issue, avoid it, no matter how on sale it is.

Caitlin xoxo

Tuesday, August 16, 2011

A little lamp DIY!

Hey Chicas!!

I have totally been into DIY lately, especially for the home.  You know curtains, lampshades (I'm getting there, dets below), shades, blankets, etc.  Anything that is basically an accessory to your house.  I have one that I wanted to share with you as it took only 30 minutes, and I had everything I need already at home!

This is one that I had actually done a few months back, and was in my makeup area.

Now for the details, and some confessions...I love The Habitat ReStore, I know that a lot of bloggers (especially house DIY) talk about donating their unused/unwanted items to habitat, but I actually love to go and buy your unwanted items.  But here on PEI I actually don't know of too many DIYers to that extent.  A lot of people just don't see beyond the color, or shape of the lamps, and can't see beyond what they have always seen it as, and can't reinvent it in their own home.

I picked up a white ceramic lamp for $8 at the ReStore.

But not being in the whole "document the whole process so that you can share it on your blog" phase, I sadly didn't take wonderful pics of the process.  So here is my cropped picture of the lamp base.  Its just white and boring.

Next I bought a lampshade at Wal-Mart for like $9, but it wasn't exactly what I wanted.....Its a natural fiber small lampshade, but don't you worry I've fancied it up. :-)

Do you notice the white fluffy under the shade?  Yeah that's one of the fancy elements....white marabou fur!  Now don't freak out, I've, no my Mom has had this stuff since I was 7 years old, it was on one of my pink skating outfits.  I was rockin' it back then. (Besides, I don't even know if its real!)

Because the shade had a natural weave to it, so (gosh, I wish that I had shown you guys better) I took invisible thread and needle and gently weaved it on to the base of the shade.  But the top was missing something.....

So who doesn't love the fur right?  But, I wasn't done yet.  I had gotten silver mardi gras beads from an event that I had attended.  The issue with that is what do you do with them after?  You are obviously not going to wear them to work, but you don't necessarily want to get rid of them. 

I simply measured them out, and placed them on top of the fur, so that you would get a sliver of sparkle showing through the edges of the fur.  And then decided since I had enough to put it around the tip of the shade, and down the back on the seam.  I think that they look like buttons, and I love it.

It's fun, feminine, with a little whimsy.  My advice, just take a look at things that you have around that house, and see what you love and how you can reinvent it make a change.


Caitlin xoxo

Thursday, August 11, 2011

What do you have on your desk at work?

Hey Chicas!!

So, I have a really really good excuse that involves a lot of emotional roller coaster ride and a happy happy ending for all involved (for those who matter, anyway :-))

I have it all planned out on how to tell you guys, but I just need time for it to sink in for me.  And if you guys are at all interested in this news.  Did I leave you hanging and wanting more!?... hehe hopefully...

So I was eating my lunch at my desk.......yes I know its totally exciting lifestyle I live at work.  But it got me thinking as to what do you have on your desk in the line of beauty products?

I snapped some pictures of mine....


Oh, can you hold your excitement in!?   If you did wait for it.......there is moorrreee!


There, that's them, in their natural habitat....


And let me tell you that this random collection of whatever with pens and highlighters are just not doing it for me.  I need to invest in some sort of cute bowl, or pencil dish......or something!  They roll around and get lost and being slightly Type A...just slightly....I can't deal with it much longer.

But in case you are wondering what I have I'll give you the run down as to not keep you waiting...hehe

Top - Nivea PearlyShine
Lip Smacker - Kool-Aid Slammin' Strawberry Kiwi
Lip Smacker - Bubble Gum (the one with the lack of labeling)
Bottom - Sally Hansen Miracle Care Lipsaver- Serenity
Right Top - GenTeal Artificial Tears (Contacts + Computer Screens = dry dry itchy eyes)

I like them all except for the Nivea Pearly Shine - it does have a nice shimmer pale pink tone, but it's soo drying, it's not moist in the tube and it takes it all from my lips, and it's not good.  Why is it still on my desk, because, just in case I need it.  Which I won't but you know, just in case.

The Kool-Aid Slammin' Strawberry Kiwi gives a surprisingly nice natural deep pink color, and its moist!  Which is really what you want at work so that your lips have color, and aren't dried out from the central air.

Sadly the Bubble Gum, has now met is maker, yup, I just had to include it as I've had for the longest time it was  a little waxy but it totally sealed in all the moisture on my lips and left a nice sheen on them too! 

Sally Hansen, it the most lipstick like product with it's high impact gloss, and the middle when you squeeze it you get the darker berry tone which is an awesome two in one product!!

The hand cream, is Beautifully Delicious Handlicious Honey & Almond, my feeling s are ugh, whateva... it's not great, isn't not crap, and it smells nice...which is nice to have in the work place with all the other "smells" that are around the office.

So all that being said, have you forgot about my happy ending news, that I'm letting sink in?  No? Well good thing that I reminded you then :)

What's on your desk at work, and what do you keep it in?

Caitlin xoxo